
CRUD application with Express and PostgresSQL in 10 steps
2019-10-15 #javascript#node#sql
The goal of this very simple project is to develop a Node JS application to learn how to:
- Create a very basic website with Express.
- Manage an SQL database (PostgresSQL in this case).
This post is only a tutorial to understand how it works and to have a starting point to train myself gradually to Node and Express (and probably later to Sequelize). It is by no means a guide to good practice for developing "real" applications. Nor is it an article to learn how to program or to convince anyone to use Node, Express or SQL...
The final JavaScript code is visible in the appendix at the end of the post. The complete code of the application (in french) is available on GitHub.
At the moment, there is no demonstration site for the completed project. I have not (yet) found an easy solution to host it. Maybe I'll do another tutorial the day I deal with this problem.
Note: This tutorial is pretty much a copy/paste of the tutorial CRUD application with Express and SQlite in 10 steps. If, like me, you have already followed it, it will go quite quickly and it's a good review of what was presented there. Otherwise, it's not much more complicated and as everything is re-explained, it's not necessary to have followed the first tutorial with SQlite before starting this one with Express and PostgreSQL.
Table of Contents
- Create a new Node project
- Add modules to the Node project
- Create the Express application
- Add EJS views
- Use views in Express
- First steps with the node-postgres module
- Modify an existing row
- Create a new row
- Delete a row
- Conclusion
1. Create a new Node project
Create a folder for the project
You can start at the command line (or "Command prompt" in Windows):
E:\> cd Code
E:\Code> mkdir AppTestPG
This creates a sub-folder "AppTestPG" in my "E:\Code" directory that is used to test different things.
Open the folder with Visual Code
Always on the command line, launch Visual Code to open the "AppTestPG" folder:
E:\Code> cd AppTestPG
E:\Code\AppTestPG> code .
From there, the Windows command prompt is no longer useful and can be closed. The rest will take place in Visual Code or in its terminal.
Initiate the Node project
To do this, open the Visual Code terminal and run the npm init command:
Menu : View / Terminal Or shortcut: Ctrl + Backtick;
=>
PS E:\Code\AppTestPG> npm init -y
=>
Wrote to E:\Code\AppTestPG\package.json:

{
  "name": "AppTestPG",
  "version": "1.0.0",
  "description": "",
  "main": "index.js",
  "scripts": {
    "test": "echo \"Error: no test specified\" && exit 1"
  },
  "keywords": [],
  "author": "",
  "license": "ISC"
}
Note: For this example, it is faster to do npm init -y (or npm init -yes) than to type
In Visual Code, the "package.json" file created by NPM now appears in the root folder of the project ("E:\Code\AppTestPG" in this case).
2. Add modules to the Node project
Technical choices
The objective of this tutorial is to test the development of a web-based Node application. To do this, you must install Express because it is the most commonly used Node framework for this type of application.
Express needs a template system to generate views. To avoid complicating things, I choose EJS: there is real HTML in it and it looks a lot like the ASP syntax (before Razor).
To manage the database, this time I'm starting with a rather classic choice, namely PostgreSQL. With Node JS, it is the module "node-postgres" that serves as the interface for PostgreSQL.
Install dependencies
This is done in the command line, in the Visual Code terminal:
PS E:\Code\AppTestPG> npm install express
PS E:\Code\AppTestPG> npm install ejs
PS E:\Code\AppTestPG> npm install pg
Note: Strangely enough, you have to use the name/identifier "pg" to install the "node-postgres" module.
Or to go faster:
PS E:\Code\AppTestPG> npm install express ejs pg
When the installation of these three dependencies (and their own dependencies) is complete, the "package.json" file contains a new "dependencies" section that saves the list of project dependencies:
{
  "name": "AppTestPG",
  "version": "1.0.0",
  "description": "",
  "main": "index.js",
  "scripts": {
    "test": "echo \"Error: no test specified\" && exit 1"
  },
  "keywords": [],
  "author": "",
  "license": "ISC",
  "dependencies": {
    "ejs": "^2.7.1",
    "express": "^4.17.1",
    "pg": "^7.12.1"
  }
}
Note: In older tutorials, we still see the syntax npm install --save xxxxx to save the list of dependencies in the "package.json" file, but this is no longer necessary since NPM version 5.
The "node_modules" folder
The "node_modules" subdirectory is used by NPM to store all the dependency files of a Node project.
When the project is versioned in GIT, this folder must be ignored so that it is not commited in the repository:
- It's usually a huge file.
- The
npm installcommand without argument allows to (re)install dependencies
To test this, you can delete the "node_modules" folder:
PS E:\Code\AppTestPG> rd node_modules /s /q
Note: Under Windows, the /s /q options allow you to delete everything without question.
Then we install all the dependencies listed in the "package.json" file:
PS E:\Code\AppTestPG> npm install
3. Create the Express application
Check that it can work...
To be sure that everything is installed correctly, the safest way is to start with a "index.js" file with a minimum content:
const express = require("express");

const app = express();

app.listen(3000, () => { {
  console.log("Server started (http://localhost:3000/) !");
});

app.get("/", (req, res) => { {
  res.send ("Hello world...");
});
Then, in the Visual Code terminal:
PS E:\Code\AppTestPG> node index
=>
Server started (http://localhost:3000/) !
All we have to do now is check that it really works:
- Launch a browser
- Go to the URL "http://localhost:3000/"
The message "Hello world..." should appear as below:
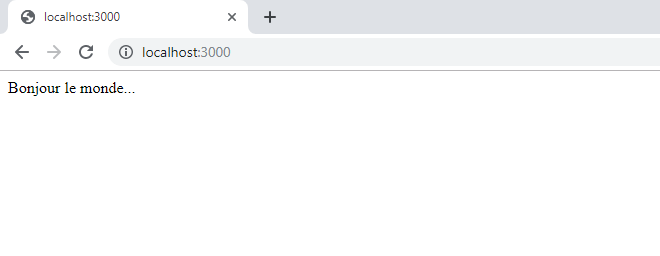
It's OK => stop the server by typing Ctrl+C in the Visual Code terminal.
How does it work?
The first line references / imports the Express module.
const express = require("express");
The following line is used to instantiate an Express server.
const app = express();
This server is then started and waits for requests on port 3000. The callback function is used to display an informative message when the server is ready to receive requests.
app.listen(3000, () => { {
  console.log("Server started (http://localhost:3000/) !");
});
Then comes a function to answer GET requests pointing to the root of the site.
app.get("/", (req, res) => { {
  res.send ("Hello world...");
});
Roughly speaking...
And more precisely?
It doesn't seem so, but the app.get() method does a lot of things in only 3 lines of code.
It responds to HTTP GET requests that arrive on the URL that is passed to it with the 1st parameter. In our case, it is "/", i.e. the root of the site.
When such a request hit the server, it is passed to the callback function which is defined as a 2nd parameter. Here, it is the following arrow function:
(req, res) => {
  res.send ("Hello world...");
}
This callback function receives two objects in parameters that are quite common for any good web server these days:
- the variable
reqwhich contains aRequestobject - the variable
resthat contains aResponseobject
The Request object is the HTTP request that was sent by the browser (or any other client). You can therefore find information about this request, such as parameters, headers, cookies, body, etc....
The Response object is the HTTP response that will ultimately be returned to the browser (or any other client).
In our program, the answer will be the text "Hello world..." that is sent using the Response.send() method, which does "just" two things:
- It returns the text in the body part of the HTTP response
- It terminates the connection
Note: It's quite technical for this tutorial.
Improve the launch of the Node application
Let's get back to simpler things. In the "scripts" section of the "package.json" file, it is recommended to add a line to "automate" the launch of the Node application:
"start": "node index"
This gives (without forgetting the comma at the end of the line):
{
  "name": "AppTestPG",
  "version": "1.0.0.0",
  "description":"",
  "hand": "index.js",
  "scripts": {
    "start": "node index",
    "test": "echo \"Error: no test specified\" && exit 1"
  },
  "keywords": [],
  "author": "",
  "license": "ISC",
  "dependencies": {
    "ejs": "^2.7.1",
    "express": "^4.17.1",
    "pg": "^7.12.1"
  }
}
The program can now be started by running:
PS E:\Code\AppTestPG> npm start
=>
> AppTestPG@1.0.0 start E:\Code\AppTestPG
> node index.js

Server started (http://localhost:3000/) !
And don't forget the Ctrl+C to stop the Express server at the end.
Note: It is possible to use the "nodemon" module to avoid having to stop / restart the server each time the source code is modified. But I prefer not to talk about too many things at once in this tutorial.
4. Add EJS views
Since the purpose of the application is to have several functionalities, you need to create several views. Unfortunately, EJS does not manage layouts. It is therefore necessary to hack by inserting a partial view at the beginning of the view for all HTML that must come before the view-specific content and a second partial view with the HTML code to "finish" the page.
In the case of the view corresponding to the request to the site root (i.e. a "GET /"), it will therefore be necessary to create the "index.ejs" view and the two reusable partial views "_header.ejs" and "_footer.ejs".
Note: These three files must be saved in a "views" folder, which must therefore be created first.
Partial view "views/_header.ejs"
<!doctype html>
<html lang="fr">

<head>
  <meta charset="utf-8">
  <meta name="viewport" content="width=device-width, initial-scale=1, shrink-to-fit=no">
  <title>AppTestPG</title>
  <link rel="stylesheet" href="/css/bootstrap.min.css">
</head>

<body>

  <div class="container">

    <nav class="navbar navbar-expand-lg navbar-light bg-light">
      <a class="navbar-brand" href="/">AppTestPG</a>
      <ul class="navbar-nav mr-auto">
        <li class="nav-item">
          <a class="nav-link" href="/about">About</a>
        </li>
        <li class="nav-item">
          <a class="nav-link" href="/data">Data</a>
        </li>
        <li class="nav-item">
          <a class="nav-link" href="/books">Books</a>
        </li>
      </ul>
    </nav>
View "views/index.ejs"
<%- include("_header") -%>

<h1>Hello world...</h1>

<%- include("_footer") -%>
Partial view "views/_footer.ejs"
<footer>
<p>© 2019 - AppTestPG</p>
</footer>
</div>
</body>
</html>
Note: Apart from the two <%- include(partial_view) -%>, it is only HTML. This is one of the advantages of EJS over other template engines to avoid having to get distracted when you start.
Add a style sheet
As you can see in the three views above, they refer to Bootstrap 4.
To do this, you have to create a "public" folder in which you create a sub-folder "css" where you just have to copy the file "bootstrap.min.css" corresponding to version 4.3.1 of Bootstrap in my case.
5. Use views in Express
Note: If this had not been done at the beginning of the project, it would have been necessary to install the "EJS" module by an npm install ejs to be able to use it.
Changes to "index.js"
To use the views created in the Express application, you need to modify the "index.js" file a little.
- Notify that the EJS template engine must be used.
app.set("view engine", "ejs");
Note: It is not necessary to do a const ejs = require("ejs") before because Express does it for us.
- Specify that the views are saved in the "views" folder.
app.set("views", __dirname + "/views");
Or better, by using the "path" module included with Node:
const path = require("path");
...
app.set("views", path.join(__dirname, "views"));
Note: There is no need to install the path module with NPM beforehand, because it's a standard module of Node JS.
- Indicate that static files are saved in the "public" folder and its subdirectories. It is a setting that is necessary for the file "bootstrap.min.css" previously copied into "public/css" to be accessible.
app.use(express.static(path.join(__dirname, "public")));
And finally, return the "index.ejs" view rather than a simple "Hello world..." message as before.
app.get("/", (req, res) => { {
  // res.send("Hello world...");
  res.render("index");
});
Check that it works
- Make an
npm startin the Visual Code terminal - Navigate to "http://localhost:3000/" with Chrome
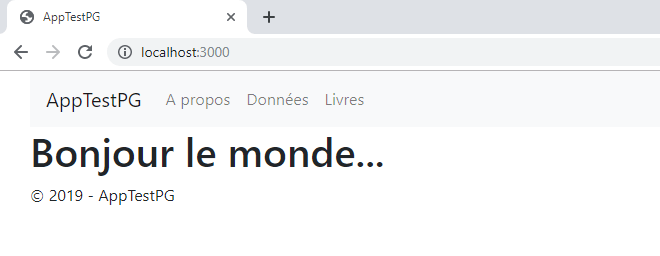
- The following page should appear:
Add the "/about" path
The application's navigation bar contains an "About" choice that sends to the URL "http://localhost:3000/about". This menu is defined in the "nav" part of the partial view "_header.ejs", but for the moment, nothing exists to manage this route.
- In "index.js", add a function to answer a request to "/about" and return the "about.ejs" view in this case.
app.get("/about", (req, res) => {
  res.render("about");
});
- Create a new "about.ejs" view in the "views" folder (by re-using both partial views).
<%- include("_header") -%>

<h1>About AppTestPG</h1>

<p>Blah blah blah blah blah...</p>

<%- include("_footer") -%>
-
Stop the server with Ctrl+C (if this had not been done before).
-
Restart the server with
npm start(this is mandatory to take into account the changes made to the project). -
Navigate to "http://localhost:3000/".
-
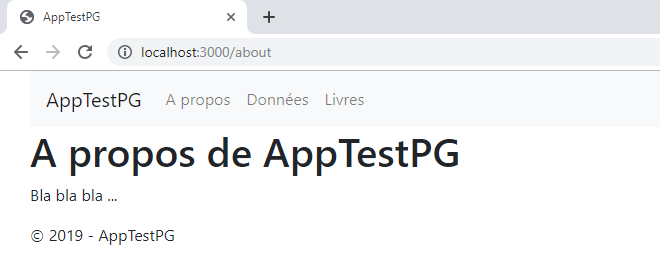
Click on the "About" menu, which gives you:
Send data from the server to the view
The application's navigation bar also contains the "Data" choice that sends to the URL "http://localhost:3000/data". This URL will be used to see how to "inject" data into the view from the program.
First of all, it is necessary to add a function to "index.js" to take into account the URL "/data" and render the corresponding view, but this time by adding the object to be transmitted to it.
app.get("/data", (req, res) => {
  const test = {
    title: "Test",
    items: ["one", "two", "three"]
  };
  res.render("data", { model: test });
});
Then you must add a "data.ejs" view in the "views" folder to display the data transmitted to it by the application.
<%- include("_header") -%>

<h1><%= model.title %>></h1>

<ul>

  <% for (let i = 0; i < model.items.length; i++) { %>
    <li><%= model.items[i] %></li>
  <% } %>

</ul>

<%- include("_footer") -%>
Note: The purpose of this tutorial is not too much to explain how EJS works. I chose this template engine because its syntax is based on <%... %> which is quite common, whether with ASP, PHP, Ruby... And for the rest, it is JavaScript (hence the name Embedded JavaScript).
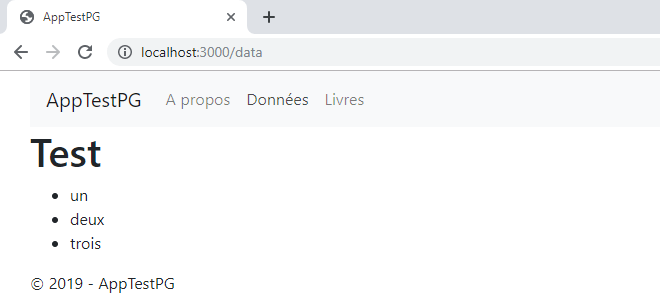
And now, when you navigate to "http://localhost:3000/data" after restarting the site, you get:
The updated "index.js" file
const express = require("express");
const path = require("path");

// Creating the Express server
const app = express();

// Server configuration
app.set("view engine", "ejs");
app.set("views", path.join(__dirname, "views"));
app.use(express.static(path.join(__dirname, "public")));

// Starting the server
app.listen(3000, () => {
  console.log("Server started (http://localhost:3000/) !");
});

// GET /
app.get("/", (req, res) => {
  // res.send("Hello world...");
  res.render("index");
});

// GET /about
app.get("/about", (req, res) => {
  res.render("about");
});

// GET /data
app.get("/data", (req, res) => {
  const test = {
    titre: "Test",
    items: ["one", "two", "three"]
  };
  res.render("data", { model: test });
});
6. First steps with the node-postgres module
Note: If this had not been done at the beginning of the project, it would have been necessary to install the node-postgres module by an npm install pg to be able to access a PostgreSQL database under Node.
Access a PostgreSQL database
This is the part that's a little more complicated compared to SQlite. Let's say we have three solutions :
- Installing PostgreSQL => it's a no (this is not the purpose of this tutorial).
- Having a PostgreSQL server on hand already => it's perfect (so, you know enough about it).
- Using a server in the cloud => it looks great (but it's a little longer).
If you need to go through a PostgreSQL database in the cloud, I propose to see briefly how to do it with ElephantSQL (it's very simple, you should get out without me):
- Go to the website https://www.elephantsql.com/
- Click on the "Get a managed database today" button
- Choose the "Tiny Turtle" instance which is free
- Once on the login screen, click on the "Sign Up" link at the bottom
- Enter your email address and click on the new "Sign Up" button
- In the confirmation email received, click on the "Confirm Email" button
- When you arrive on the "Create an account" screen, you must:
- Enter a password (and confirm it)
- Accept their conditions
- Accept or refuse emails from them
- Click on the "Submit" button
- Once on the list of your instances (empty), click on the "+ Create New Instance" button and follow the 4 steps:
- 1 : "Select a plan and name" => stay on "Tiny Turtle" and give a name
- 2 : "Select a region and data center" => choose the one closest to your home (but not all are available with the free offer)
- 3 : "Configure" => grayed out because it's reserved for dedicated plans
- 4 : "Confirm new instance" => here we go!
We then return to the list of instances that now contains the instance that we just created. You must then click on his name to get the connection information you will need in the next part:
- server : xxxxxxx.elephantsql.com
- user & default database: mystery
- password: asecretthingthatnoonehastosee
Declare the node-postgres module
First, refer to "pg" at the top of the "index.js" program, with the other two declarations for "express" and "path".
const { Pool } = require("pg");
Connection to the PostgreSQL database
Then add the code to connect to the database just before starting the Express server.
const pool = new Pool({
  user: "mystery",
  host: "xxxxx.elephantsql.com",
  database: "mystery",
  password: "asecretthingthatnoonehastosee",
  port: 5432
});
console.log("Successful connection to the database");
Note: Of course, you don't write all this connection information in plain text in the code. In a real application, they would be retrieved by default from environment variables or set in a ".env" file using the "dotenv" module.
After this code has been executed, the variable "pool" is a Pool object from the node-postgres module which represents a connection to the database. This object will later be used to access the contents of the database and to make queries on this database.
Creating a "Books" table
For this tutorial, we will create a table of books with 4 columns:
- Book_ID: the automatic identifier
- Title: the title of the book
- Author: the author of the book
- Comments: a memo field with some notes about the book
The SQL query to create such a table under PostgreSQL is as follows:
CREATE TABLE IF NOT EXISTS Books (
  Book_ID SERIAL PRIMARY KEY,
  Title VARCHAR(100) NOT NULL,
  Author VARCHAR(100) NOT NULL,
  Comments TEXT
);
Which give:
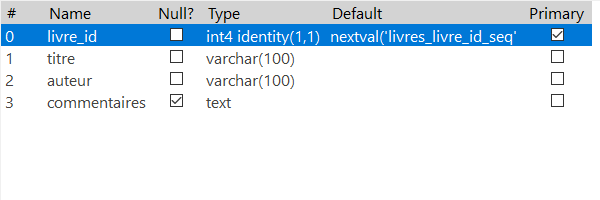
To learn how to do this in Node, we will create the table from the application. Simply add the code below just after connecting to the database.
const sql_create = `CREATE TABLE IF NOT EXISTS Books (
  Book_ID SERIAL PRIMARY KEY,
  Title VARCHAR(100) NOT NULL,
  Author VARCHAR(100) NOT NULL,
  Comments TEXT
);`;

pool.query(sql_create, [], (err, result) => {
  if (err) {
    return console.error(err.message);
  }
  console.log("Successful creation of the 'Books' table");
});
This code uses the .query() method of the Pool object fom the node-postgres module. This method executes the SQL query that is passed to it in 1st parameter then calls the callback function corresponding to the 3rd parameter, by passing it an object err to be able to check if the execution of the request was proceeded correctly and a result object containing the result of the query.
Note: The table will only be created if it does not exist yet, thanks to the SQL clause "IF NOT EXISTS". It wouldn't be great for a real application, right now it's just a tutorial.
Seeding the "Books" table
To facilitate the next parts of this tutorial, it is more convenient to insert a few books in the database. Under PostgreSQL, we could make the following query:
INSERT INTO Books (Book_ID, Title, Author, Comments) VALUES
  (1, 'Mrs. Bridge', 'Evan S. Connell', 'First in the serie'),
  (2, 'Mr. Bridge', 'Evan S. Connell', 'Second in the serie'),
  (3, 'L''ingénue libertine', 'Colette', 'Minne + Les égarements de Minne')
ON CONFLICT DO NOTHING;
If we don't have a PostgreSQL client, it can be done in JavaScript, just after creating the "Books" table (because we don't want to insert the books before the table is created):
  ...
  console.log("Successful creation of the 'Books' table");
  // Database seeding
  const sql_insert = `INSERT INTO Books (Book_ID, Title, Author, Comments) VALUES
    (1, 'Mrs. Bridge', 'Evan S. Connell', 'First in the serie'),
    (2, 'Mr. Bridge', 'Evan S. Connell', 'Second in the serie'),
    (3, 'L''ingénue libertine', 'Colette', 'Minne + Les égarements de Minne')
  ON CONFLICT DO NOTHING;`;
  pool.query(sql_insert, [], (err, result) => {
    if (err) {
      return console.error(err.message);
    }
    const sql_sequence = "SELECT SETVAL('Books_Book_ID_Seq', MAX(Book_ID)) FROM Books;";
    pool.query(sql_sequence, [], (err, result) => {
      if (err) {
        return console.error(err.message);
      }
      console.log("Successful creation of 3 books");
    });
  });
Normally, it is not necessary to define identifiers during INSERTs, but in this case, it prevents the data from being re-inserted each time the server starts.
But for PostgreSQL to be able to find its way around later on, it is necessary to re-initialize the sequence used to feed the "Book_ID" identifier. This is done by executing the "SELECT SETVAL('Books_Book_ID_Seq', MAX(Book_ID)) FROM Books;" query.
Now, the "Books" table contains the following 3 lines:

Display the list of books
Now that our "Books" table contains some data, it is possible to create a method for the URL "http://localhost:3000/books" of the site in order to read the list of books stored in the database and display this list in the view.
To read the list of books, it's quite simple. We make a query like "SELECT * FROM ..." that we also execute via the pool.query() method of the node-postgres module. Once the query is completed, this method pool.query() calls a callback function, possibly passing it an error and the result of the
query, with among other things the list of books obtained by the SQL query. If all goes well, the callback function can then send these results to the view.
app.get("/books", (req, res) => {
  const sql = "SELECT * FROM Books ORDER BY Title"
  pool.query(sql, [], (err, result) => {
    if (err) {
      return console.error(err.message);
    }
    res.render("books", { model: result.rows });
  });
});
Some explanations on the line of code pool.query(sql, [], (err, result) => { ... }:
- The 1st parameter is the SQL query to execute
- The 2nd parameter is an array with the variables necessary for the query. Here, the value "[]" is used because the query does not need a variable.
- The 3rd parameter is a callback function called after the execution of the SQL query.
- (err, result)" corresponds to the parameters passed to the callback function. "err" may contain an error object and "result" is an object containing information about the result of the execution of the query, including a "rows" array corresponding to the list of lines returned by the SELECT.
To display this list of books, we can firts create a view "books.ejs" in the folder "views" with the following code:
<%- include("_header") -%>

<h1>List of books</h1>

<ul>

  <% for (const book of model) { %>
    <li>
      <%= book.title %>
      <em>(<%= book.author %>)</em>
    </li>
  <% } %>

</ul>

<%- include("_footer") -%>
After restarting the application with npm start, the following result is obtained by clicking on the "Books" menu:
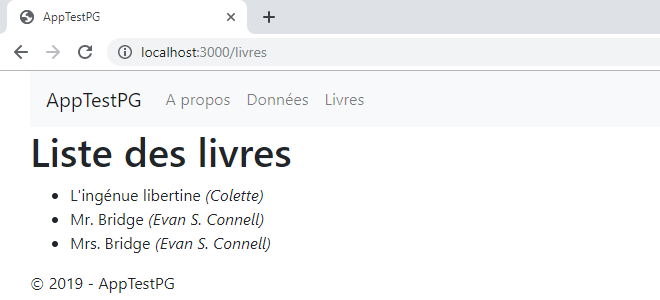
Note: You have to be careful and write "book.title" and not "book.Title" because even though the "Books" table was created using capital letters as initials for column names, PostgreSQL has transformed these names into lower case letters.
Display books in tabular form
Now that the method for displaying the list of books works, we will improve the presentation of these data. The view from the previous step used a simple "ul / li" list to display the books. The code in this view "books.ejs" will be completely modified to use an HTML table.
<%- include("_header") -%>

<h1>List of books (<%= model.length %>)</h1>

<div class="table-responsive-sm">
  <table class="table table-hover">
    <thead>
      <tr>
        <th>Title</th>
        <th>Author</th>
        <th>Comments</th>
        <th class="d-print-none">
          <a class="btn btn-sm btn-success" href="/create">Add</a>
        </th>
      </tr>
    </thead>
    <tbody>
      <% for (const book of model) { %>
        <tr>
          <td><%= book.title %></td>
          <td><%= book.author %></td>
          <td><%= book.comments %></td>
          <td class="d-print-none">
            <a class="btn btn-sm btn-warning" href="/edit/<%= book.book_id %>">Edit</a>
            <a class="btn btn-sm btn-danger" href="/delete/<%= book.book_id %>">Delete</a>
          </td>
        </tr>
      <% } %>
    </tbody>
  </table>
</div>

<%- include("_footer") -%>
There you go! Ctrl+C if necessary, npm start and then navigate to the URL "http://localhost:3000/books" to have a real Bootstrap table.
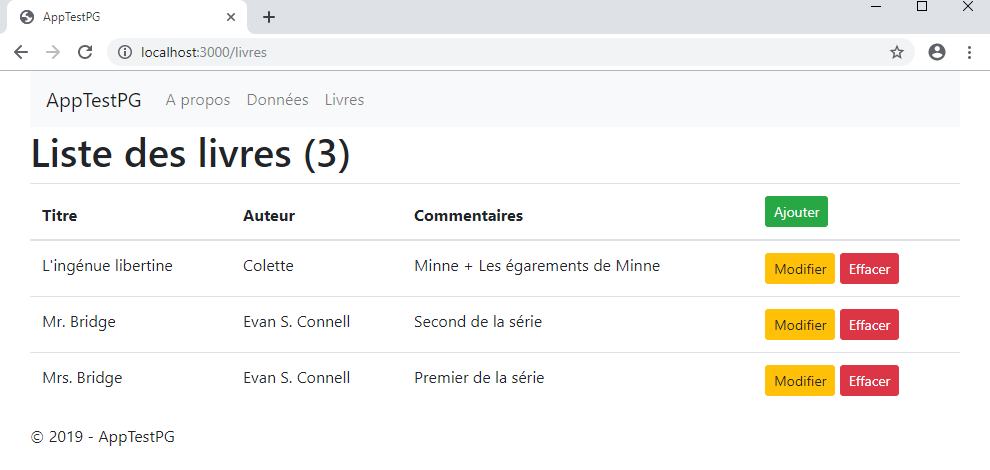
The advantage of this new view is to provide [Add], [Edit] and [Delete] buttons to update the Books table, which is essential for the rest of the tutorial.
7. Modify an existing row
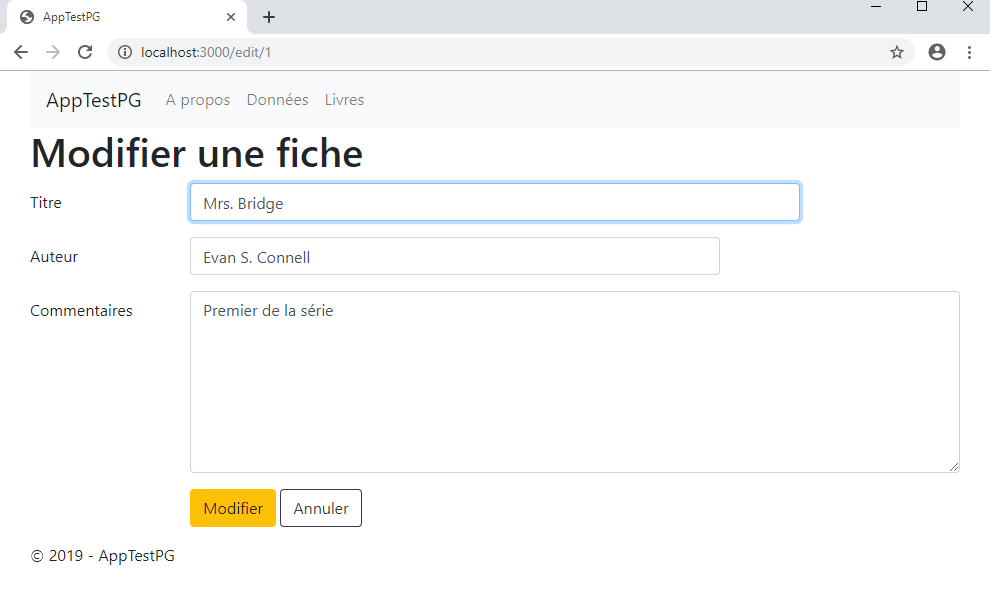
This part of the tutorial will show you how to modify an existing record. We will start by creating the necessary views to enter the information of the book to be updated. Then we will code a method to display the input form when the GET /edit/xxx route is called (by clicking on the [Edit] button in the book list). And finally, a method corresponding to the POST /edit/xxx route will be used to update the database when the user validates the changes(by clicking the [Update] button at the bottom of the input form).
The "views/edit.ejs" and "views/_editor.ejs" views
The main view for editing a book is a fairly classic Bootstrap form.
<%- include("_header") -%>

<h1>Update a record</h1>

<form action="/edit/<%= model.book_id %>" method="post">
  <div class="form-horizontal">

    <%- include("_editor") -%>

    <div class="form-group row">
      <label class="col-form-label col-sm-2"></label>
      <div class="col-sm-10">
        <input type="submit" value="Update" class="btn btn-default btn-warning" />
        <a class="btn btn-outline-dark cancel" href="/books">Cancel</a>
      </div>
    </div>
  </div>
</form>

<%- include("_footer") -%>
The previous view uses the partial view "_editor.ejs" which contains the HTML code dedicated to the different input fields. This partial view will also be used a little further on to add a new record.
<div class="form-group row">
  <label class="col-form-label col-sm-2" for="Title">Title</label>
  <div class="col-sm-8">
    <input autofocus class="form-control" name="Title" value="<%= model.title %>" />
  </div>
</div>

<div class="form-group row">
  <label class="col-form-label col-sm-2" for="Author">Author</label>
  <div class="col-sm-7">
    <input class="form-control" name="Author" value="<%= model.author %>" />
  </div>
</div>

<div class="form-group row">
  <label class="col-form-label col-sm-2" for="Comments">Comments</label>
  <div class="col-sm-10">
    <textarea class="form-control" cols="20" name="Comments" maxlength="32000" rows="7"><%= model.comments %></textarea>
  </div>
</div>
The GET /edit/xxx route
You must then code a first route to display the book to be modified when responding to the GET /edit/xxx request (when the user has clicked on an [Edit] button in the book list).
To do this, we define the URL to be managed in the form "/edit/:id" where":id" corresponds to the identifier of the record to be updated. This identifier is retrieved via the Request object of the Express framework, in the list of its parameters: req.params.id.
You can then make a "SELECT..." request to obtain the book corresponding to this identifier. This request is once again executed via the pool.query() method of node-postgres. In this case, we pass it as a parameter the identifier of the book to be displayed because we used a parameterized query (via the "... = $1") to avoid SQL injection. When the query is completed, the callback function can in turn transmit the result to the view.
// GET /edit/5
app.get("/edit/:id", (req, res) => {
  const id = req.params.id;
  const sql = "SELECT * FROM Books WHERE Book_ID = $1";
  pool.query(sql, [id], (err, result) => {
    // if (err) ...
    res.render("edit", { model: result.rows[0] });
  });
});
After restarting the server, here is the input form that now appears when the user clicks an [Edit] button in the book list:
The POST /edit/xxx route
And finally, all that remains is to code the route to save the changes made to the record, during the POST /edit/xxx request. The "post" occurs when the user validates his entry by clicking on the [Update] button on the input form.
Here again, the identifier is found via the "id" parameter of the Request object. And the data entered are available via the body property of this Request object to be stored in a temporary array with the identifier.
Note: In order for Request.body to retrieve the posted values, it is necessary to add a middleware to the server configuration. This point will be explained in more detail in the next section...
The modification in the database is done via an "UPDATE..." query, again executed with the pool.query method of node-postgres to which we also pass this time an array containing the modified data and the identifier of the book to be updated.
After executing the "UPDATE..." query with the pool.query() method of node-postgres, the callback function redirects the user to the book list using the Response.redirect() method from Express.
// POST /edit/5
app.post("/edit/:id", (req, res) => {
  const id = req.params.id;
  const book = [req.body.title, req.body.author, req.body.comments, id];
  const sql = "UPDATE Books SET Title = $1, Author = $2, Comments = $3 WHERE (Book_ID = $4)";
  pool.query(sql, book, (err, result) => {
    // if (err) ...
    res.redirect("/books");
  });
});
Note: With a real application, it is essential to have a client-side and server-side input control, but this is not the subject of this tutorial.
The middleware "express.urlencoded()"
As mentioned in the previous section, it is necessary to use the middleware "express.urlencoded()" so that Request.body retrieves the posted values. This is simply done by an app.use() when configuring the server.
// Server configuration
app.set("view engine", "ejs");
app.set("views", path.join(__dirname, "views"));
app.use(express.static("public"));
app.use(express.urlencoded({ extended: false })); // <--- middleware configuration
This middleware allows you to retrieve the data sent as "Content-Type: application/x-www-form-urlencoded", which is the standard for values posted from a form. For information, it is very often used with "express.json()" middleware for data sent as "Content-Type: application/json", but here it is not necessary.
Note: There are examples that still use the "body-parser" module instead, but this is no longer useful since version 4.1.6 of Express.
8. Create a new row
The "views/create.ejs" view
The main view for creating a new book is very similar to the coded view for updating a record. Like it, it uses the partial view "_editor.ejs" for the different input fields.
<%- include("_header") -%>

<h1>Create a record</h1>

<form action="/create" method="post">
  <div class="form-horizontal">

    <%- include("_editor") -%>

    <div class="form-group row">
      <label class="col-form-label col-sm-2"></label>
      <div class="col-sm-10">
        <input type="submit" value="Save" class="btn btn-default btn-success" />
        <a class="btn btn-outline-dark cancel" href="/books">Cancel</a>
      </div>
    </div>
  </div>
</form>

<%- include("_footer") -%>
The GET /create route
Compared to edit, this function is much simpler. It just returns the "create.ejs" view by sending it an empty "book" object (because the partial view "_editor.ejs" expects such an object).
// GET /create
app.get("/create", (req, res) => {
  res.render("create", { model: {} });
});
In the case of a table with more columns than the "Books" table , it would be possible to define default values by coding this method as follows:
// GET /create
app.get("/create", (req, res) => {
  const book = {
    Author: "Victor Hugo"
  }
  res.render("create", { model: book });
});
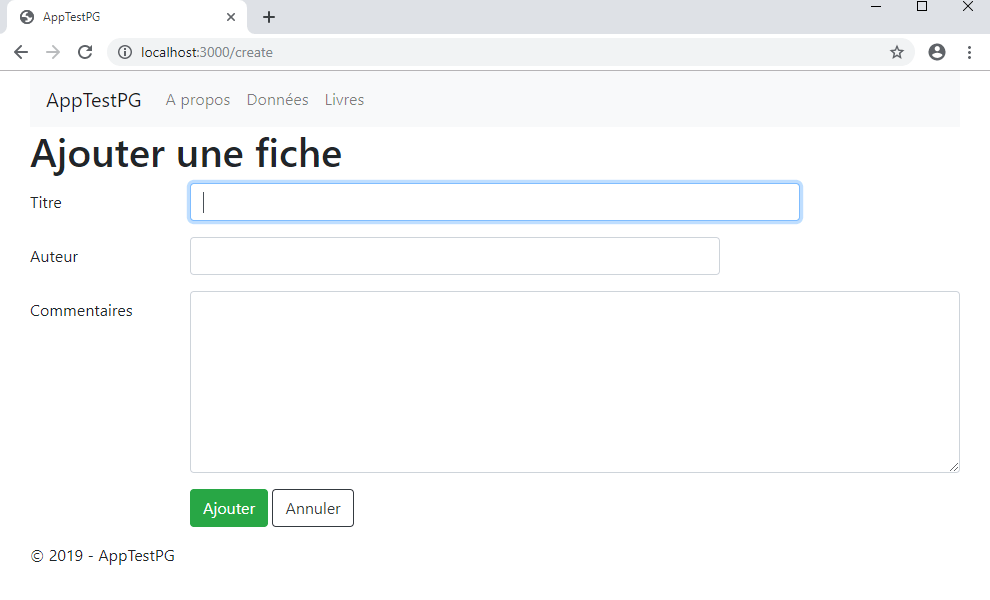
As can be seen below, the entry form for adding a new book is quite similar to the one for updating a record. This is one of the advantages of the partial view "_editor.ejs".
The POST /create route
When the user clicks on the [Save] button to validate their input, the browser sends a "post" request to this route. The method associated with it is very similar to the one used to modify a book:
- It retrieves the data entered via the
bodyproperty of theRequestobject from the Express framework. - The
pool.query()method of node-postgres is used to execute an "INSERT INTO ..." query. - The callback function redirects the user to the book list.
// POST /create
app.post("/create", (req, res) => {
  const sql = "INSERT INTO Books (Title, Author, Comments) VALUES ($1, $2, $3)";
  const book = [req.body.title, req.body.author, req.body.comments];
  pool.query(sql, book, (err, result) => {
    // if (err) ...
    res.redirect("/books");
  });
});
9. Delete a row
The "views/delete.ejs" and "views/_display.ejs" views
The main view to be able to delete a record must first display the information of the selected book to allow the user to confirm its deletion in full knowledge. It therefore looks a lot like the "edit.ejs" and "create.ejs" views.
<%- include("_header") -%>

<h1>Delete a record?</h1>

<form action="/delete/<%= model.book_id %>" method="post">
  <div class="form-horizontal">

    <%- include("_display") -%>

    <div class="form-group row">
      <label class="col-form-label col-sm-2"></label>
      <div class="col-sm-10">
        <input type="submit" value="Delete" class="btn btn-default btn-danger" />
        <a class="btn btn-outline-dark cancel" href="/books">Cancel</a>
      </div>
    </div>
  </div>
</form>

<%- include("_footer") -%>
This view uses the partial view "_display.ejs" which contains the HTML code to display the different information of a book. Technically, this code is almost identical to the one in the "_editor.ejs" view, except that the input fields are "readonly".
<div class="form-group row">
  <label class="col-form-label col-sm-2" for="Title">Title</label>
  <div class="col-sm-8">
    <input readonly class="form-control" id="Title" value="<%= model.title %>" />
  </div>
</div>

<div class="form-group row">
  <label class="col-form-label col-sm-2" for="Author">Author</label>
  <div class="col-sm-7">
    <input readonly class="form-control" id="Author" value="<%= model.author %>" />
  </div>
</div>

<div class="form-group row">
  <label class="col-form-label col-sm-2" for="Comments">Comments</label>
  <div class="col-sm-10">
    <textarea readonly class="form-control" cols="20" id="Comments" maxlength="32000" rows="7"><%= model.comments %></textarea>
  </div>
</div>
If the "Books" table contained more columns than can be displayed in the book list, this "_display.ejs" view could also be used as part of a route and a "details" view that would be used to display the entire record.
The GET /delete/xxx route
It is the same code as the GET /edit/xxx method, except that it returns the "delete.ejs" view rather than the "edit.ejs" view.
// GET /delete/5
app.get("/delete/:id", (req, res) => {
  const id = req.params.id;
  const sql = "SELECT * FROM Books WHERE Book_ID = $1";
  pool.query(sql, [id], (err, result) => {
    // if (err) ...
    res.render("delete", { model: result.rows[0] });
  });
});
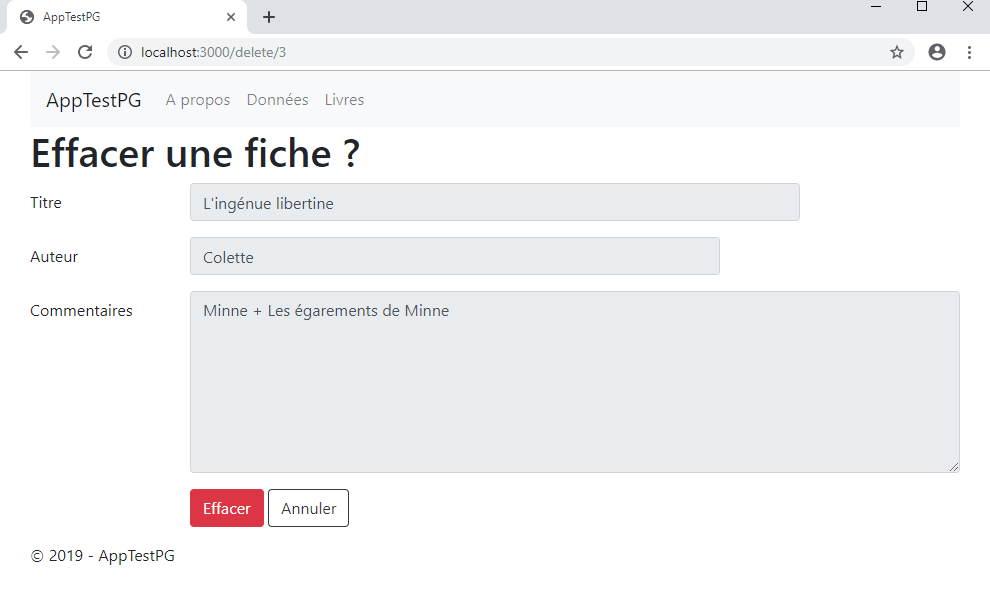
The user interface is quite similar to the usual input form. Ironically enough, the three input fields are in fact not selectable (and therefore grayed out according to Bootstrap conventions):
The POST /delete/xxx route
This simple function responds to the "post" request sent by the browser after clicking on the [Delete] button to confirm the deletion of the book. Its code looks a lot like what has already been seen so far:
- It finds the identifier of the book to be deleted via
req.params.id. - The
pool.query()method of node-postgres executes a "DELETE ..." query for this identifier. - The callback function redirects the user to the book list.
// POST /delete/5
app.post("/delete/:id", (req, res) => {
  const id = req.params.id;
  const sql = "DELETE FROM Books WHERE Book_ID = $1";
  pool.query(sql, [id], (err, result) => {
    // if (err) ...
    res.redirect("/books");
  });
});
10. Conclusion
Personally, this tutorial allowed me to progress pretty well. I wrote a second web application to update a SQL database with Node JS that looks like what I can do with Sinatra for little things. It gave me a good overview of everything that is necessary and to see that in the end it is not very far from what I'm used to do with ASP.NET MVC or Sinatra.
More generally, for the Node JS side, this tutorial gave the opportunity to review a little the use of NPM and its impact on the "package.json" file.
- npm init and npm init -y to initialize a project
- npm install... (without --save) to install modules
- npm start to launch the project
Even if this tutorial has only scratched the surface of what the Express framework offers, the developed application is a good start to learn some of the methods offered by Express. In the end, this is enough to successfully organize a basic application like I did with Sinatra.
- app.set(...) and app.use(...) to configure the server and middleware
- app.listen(port, callback) to start the server
- app.get(url, callback) to respond to GET requests
- app.post(url, callback) for POST from the input forms
- req.params.* to retrieve the named parameters from the URL (the route)
- req.body.* to access the data posted by the input form
Regarding the views, some of the basic features have been reviewed.
- res.send("text") to return a text
- res.render(view_name, model) to return a view
- res.redirect(url) to redirect the user
- use of partial views to simplify work
- and EJS looks a lot like ASP or Sinatra's ERB views
On the database side, the program showed how to manage a PostgreSQL database and that it's not more complicated than with SQlite (at least when you know SQL). Again, the code seems quite specific to the node-postgres module and I have to see how to do with other databases. Ideally, it should exist something like ADO.NET (or ODBC at least) before moving to a real ORM.
- new Pool() to connect to the database
- pool.query(sql, [params], callback) to execute all types of queries (data management, SELECT returning several lines, SELECT by ID...)
As for JavaScript itself, this application has had the advantage of practicing some of the "new features" of the language.
- use arrows functions for callbacks
- declare constants whenever possible (i.e. always in the developed program)
- use loops for.... of simpler than classic loops for (let i = 0; i < list.length; i++)
Appendix - The complete code for "index.js"
This is not to extend the post, but for those like me who like to have an overview of a program. And as much to highlight a few numbers:
- 156 lines of code
- 3 NPM dependencies (ejs, express and pg)
- 3 imported modules (express, path and pg)
Note: The complete code of the application is also available on GitHub (french version).
const express = require("express");
const path = require("path");
const { Pool } = require("pg");

// Creating the Express server
const app = express();

// Server configuration
app.set("view engine", "ejs");
app.set("views", path.join(__dirname, "views"));
app.use(express.static(path.join(__dirname, "public")));
app.use(express.urlencoded({ extended: false }));

// Connection to the PostgreSQL database
const pool = new Pool({
  user: "mystery",
  host: "xxxxx.elephantsql.com",
  database: "mystery",
  password: "asecretthingthatnoonehastosee",
  port: 5432
});
console.log("Successful connection to the database");

// Creating the Books table (Book_ID, Title, Author, Comments)
const sql_create = `CREATE TABLE IF NOT EXISTS Books (
  Book_ID SERIAL PRIMARY KEY,
  Title VARCHAR(100) NOT NULL,
  Author VARCHAR(100) NOT NULL,
  Comments TEXT
);`;
db.run(sql_create, err => {
  if (err) {
    return console.error(err.message);
  }
  console.log("Successful creation of the 'Books' table");
  // Database seeding
  const sql_insert = `INSERT INTO Books (Book_ID, Title, Author, Comments) VALUES
    (1, 'Mrs. Bridge', 'Evan S. Connell', 'First in the serie'),
    (2, 'Mr. Bridge', 'Evan S. Connell', 'Second in the serie'),
    (3, 'L''ingénue libertine', 'Colette', 'Minne + Les égarements de Minne');
  ON CONFLICT DO NOTHING;`;
  pool.query(sql_insert, [], (err, result) => {
    if (err) {
      return console.error(err.message);
    }
    const sql_sequence = "SELECT SETVAL('Books_Book_ID_Seq', MAX(Book_ID)) FROM Books;";
    pool.query(sql_sequence, [], (err, result) => {
      if (err) {
        return console.error(err.message);
      }
      console.log("Successful creation of 3 books");
    });
  });
});

// Starting the server
app.listen(3000, () => {
  console.log("Server started (http://localhost:3000/) !");
});

// GET /
app.get("/", (req, res) => {
  // res.send("Hello world...");
  res.render("index");
});

// GET /about
app.get("/about", (req, res) => {
  res.render("about");
});

// GET /data
app.get("/data", (req, res) => {
  const test = {
    titre: "Test",
    items: ["one", "two", "three"]
  };
  res.render("data", { model: test });
});

// GET /books
app.get("/books", (req, res) => {
  const sql = "SELECT * FROM Books ORDER BY Title";
  pool.query(sql, [], (err, result) => {
    if (err) {
      return console.error(err.message);
    }
    res.render("books", { model: result.rows });
  });
});

// GET /create
app.get("/create", (req, res) => {
  res.render("create", { model: {} });
});

// POST /create
app.post("/create", (req, res) => {
  const sql = "INSERT INTO Books (Title, Author, Comments) VALUES ($1, $2, $3)";
  const book = [req.body.title, req.body.author, req.body.comments];
  pool.query(sql, book, (err, result) => {
    if (err) {
      return console.error(err.message);
    }
    res.redirect("/books");
  });
});

// GET /edit/5
app.get("/edit/:id", (req, res) => {
  const id = req.params.id;
  const sql = "SELECT * FROM Books WHERE Book_ID = $1";
  pool.query(sql, [id], (err, result) => {
    if (err) {
      return console.error(err.message);
    }
    res.render("edit", { model: result.rows[0] });
  });
});

// POST /edit/5
app.post("/edit/:id", (req, res) => {
  const id = req.params.id;
  const book = [req.body.title, req.body.author, req.body.comments, id];
  const sql = "UPDATE Books SET Title = $1, Author = $2, Comments = $3 WHERE (Book_ID = $4)";
  pool.query(sql, book, (err, result) => {
    if (err) {
      return console.error(err.message);
    }
    res.redirect("/books");
  });
});

// GET /delete/5
app.get("/delete/:id", (req, res) => {
  const id = req.params.id;
  const sql = "SELECT * FROM Books WHERE Book_ID = $1";
  pool.query(sql, [id], (err, result) => {
    if (err) {
      return console.error(err.message);
    }
    res.render("delete", { model: result.rows[0] });
  });
});

// POST /delete/5
app.post("/delete/:id", (req, res) => {
  const id = req.params.id;
  const sql = "DELETE FROM Books WHERE Book_ID = $1";
  pool.query(sql, [id], (err, result) => {
    if (err) {
      return console.error(err.message);
    }
    res.redirect("/books");
  });
});
Version en français : Application CRUD avec Express et PostgreSQL en 10 étapes.